- Level: Beginner
- Pose type: Kneeling · Hip opener
- Body area: Hips · Quadriceps · Legs
- Props: blanket, block, bolster, strap, chair, wall
Low Lunge (Anjaneyasana)
Pronounced ahn-jah-nay-AHS-ah-nah
Quick answer
Kneel on a padded mat, bring one foot forward so its knee sits over the ankle, and keep the back knee down with the top of the back foot flat. With your hands resting on the front thigh or on blocks, ease your hips forward until the front of the back hip feels a mild stretch. Keep your lower back long instead of arched.
We may earn a commission when you buy through links on this page. It never changes what we recommend. As an Amazon Associate we earn from qualifying purchases.
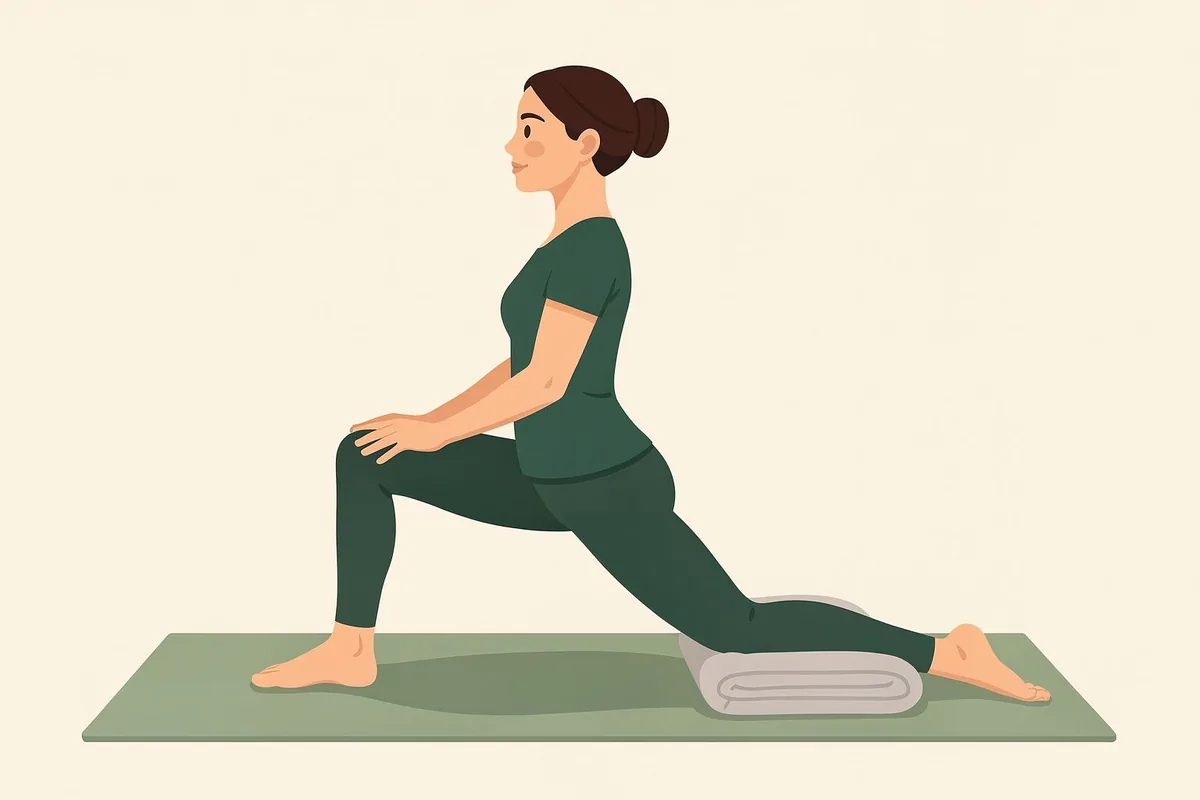
Low Lunge is a kneeling lunge. One foot steps forward, the back knee rests on the floor, and most of the stretch lands at the front of the back hip and the top of that thigh. The front leg does the work of holding you steady. You’ll meet the pose in sun salutations, between standing poses and as the usual way into Half Splits.
Your back knee carries part of your weight here, so padding comes first. The other two things that trip people up are a lower back that sags into an arch and balance that wobbles, and this guide shows how to handle all three. It’s part of our pose library. For a quick overview of this pose and nine others in a first-month plan, see yoga for beginners.
In this guide
How to do Low Lunge
- Fold a blanket or towel, or double over the end of your mat, and put it where your back knee will land. Start on your hands and knees.
- Bring your right foot forward so it lands between your hands, with your right knee above your right ankle and your shin close to upright. If your foot stops short, lift it the rest of the way with your hand.
- Slide your left knee back a few inches onto the padding, so your weight rests on the lower thigh just above the kneecap, not on the kneecap itself.
- Lay the top of your left foot flat, with the toes aiming straight behind you.
- Put your hands on two blocks beside your front foot, or on your front thigh, and lift your chest until your shoulders are roughly over your hips.
- Turn both hip bones to face the front of the mat, and keep them level.
- Draw your lower belly in a little and let your tailbone point down toward the floor. This keeps the movement at your hip instead of in your lower back.
- As you breathe out, let your hips travel forward and slightly down until you feel a mild pull at the front of your left hip and thigh. Stop there. Your front knee stays behind your toes.
- Stay for 5 to 8 slow breaths. If you feel steady, you can raise your arms overhead for the last few breaths, keeping your lower ribs from jutting forward.
- To come out, lower your hands to the floor or the blocks, curl your back toes under and step the front foot back beside the other knee, so you’re on hands and knees again. Then do the second side with your left foot leading.
Alignment cues
- Front foot: flat on the mat with the toes facing forward, pressing down through both the heel and the ball of the foot.
- Front knee: over your ankle and in line with your second and third toes, not drifting in or out. Some teachers allow it to edge forward in a deep lunge. If you try that, keep it behind your toes and back off at any strain in the knee. With sore knees, keep it over the ankle.
- Back knee: cushioned, with the pressure just above the kneecap.
- Back foot: straight behind the knee, top of the foot down, not rolled onto its little-toe edge.
- Hips: square and level. Picture both hip bones as headlights shining toward the front of the mat.
- Pelvis and lower back: tailbone heavy toward the floor, lower belly gently drawn in. You want to feel the stretch at the front of the hip. If you feel it mostly in your lower back, back off.
- Chest and shoulders: chest lifted, shoulders soft and away from your ears.
- Head: in line with your spine. Look ahead or slightly down.
Common mistakes
- Kneeling on the kneecap. The knee bone pressing straight into a thin mat hurts quickly. Slide the knee back so the thigh takes the load, and add padding.
- Arching instead of stretching. If your hips push forward while your belly lets go, your pelvis tips forward and your lower back sags into a curve. The front of the hip then stretches less. Bring your hips back an inch, draw your lower belly in and move forward again more slowly.
- Sinking too far forward. If your front knee slides well past your ankle or your front heel starts to lift, the knee takes the strain. Move your front foot forward until your shin is upright again, and let the depth build over a few breaths (Yoga International).
- Front knee caving in. Line it up with your middle toes again, and glance down to check it before you sink deeper.
- Back hip swinging out. When the back thigh turns out and the hips twist open, the stretch fades. Draw the back hip forward and the front hip back.
- Slumping onto the front thigh. If you can’t lift your chest, bring the floor closer with blocks under your hands.
- Holding your breath. Keep breathing slowly and evenly through the hold.
Watch out for: sharp pain in either knee, pain or tingling that runs down your leg, or a pinch in your lower back. Come out of the pose. For knee or back pain, switch to an easier version from the list below. If pain, tingling or numbness runs down your leg below the knee, or the leg feels weak, stop and contact your health care provider (MedlinePlus). Knees and lower legs are the parts of the body most often hurt in yoga, according to the NCCIH, so take knee pain as a signal to stop, not to push on.
Make it easier (props)
- More padding. Fold the blanket thicker, double your mat or kneel on a cushion. To help keep bursitis from coming back, the NHS suggests padding a joint you kneel on and taking regular breaks from kneeling.
- Blocks under your hands. Start with two yoga blocks at their tallest height beside your front foot, and lower them as the pose gets easier. Thick books work too.
- A wall or chair for balance. Kneel with one side next to a wall, or set a sturdy chair beside your front foot and rest a hand on the seat.
- A shorter lunge. Less distance between your feet means a gentler stretch, as long as your front knee stays over your ankle.
- Back toes tucked. If the top of your back foot or ankle complains, tuck your toes under. It can also help stop the back leg from turning out.
- Bolster under the back thigh. Place a bolster or a firm rolled blanket across the mat so it touches the front of your back thigh. It takes some of your weight and steadies you.
- No kneeling: chair lunge. Push a sturdy chair against a wall and stand facing it. Step one foot up onto the seat, hold the backrest and keep that knee over the ankle. Lean your hips gently forward until you feel the front of the standing leg’s hip stretch. Nothing presses on a knee in this version. Our chair yoga guide has more poses done with a chair.
Helpful gear for this pose
 Manduka begin yoga mat, 5 mm
5 mm TPE mat, 68 x 24 in, light to carry, with a center alignment stripe (maker's spec).
See it on Amazon Gaiam foam yoga blocks, pair
Two light foam blocks, 9 x 6 x 4 in each, to raise the floor under your hands (maker's spec).
See it on Amazon Hugger Mugger cotton D-ring yoga strap, 10 ft
Cotton webbing 1.5 in wide with a metal D-ring buckle, 10 ft long (maker's spec).
See it on Amazon
As an Amazon Associate we earn from qualifying purchases. How we choose gear
Variations
- Arms overhead. Many classes teach Anjaneyasana with the arms raised alongside the ears. Keep your lower ribs in, lift through your chest rather than bending at your lower back, and don’t drop your head back. Skip it if your lower back is sensitive.
- Side reach. Raise the arm on your back-leg side and reach it up and over toward the front-leg side. It adds a stretch along the side of the waist.
- Twist. Bring your palms together at your breastbone and turn toward your front leg, resting the opposite elbow outside the front knee, or keep one hand on the front thigh as you turn.
- Front-thigh stretch. Bend your back knee and reach behind you for the back foot with one hand, or loop a strap around it. This version presses harder on the back knee, so skip it if your knees are sore.
- High Lunge. Tuck your back toes and lift your back knee off the floor. Your legs and balance work harder, and nothing rests on the knee.
- Half Splits. Shift your hips back over your back knee and straighten your front leg, toes pointing up. The stretch moves to the back of the front thigh; see yoga for tight hamstrings.
Poses to do before and after
- Warm up: a few slow rounds of Cat-Cow, which begins on hands and knees just like Low Lunge.
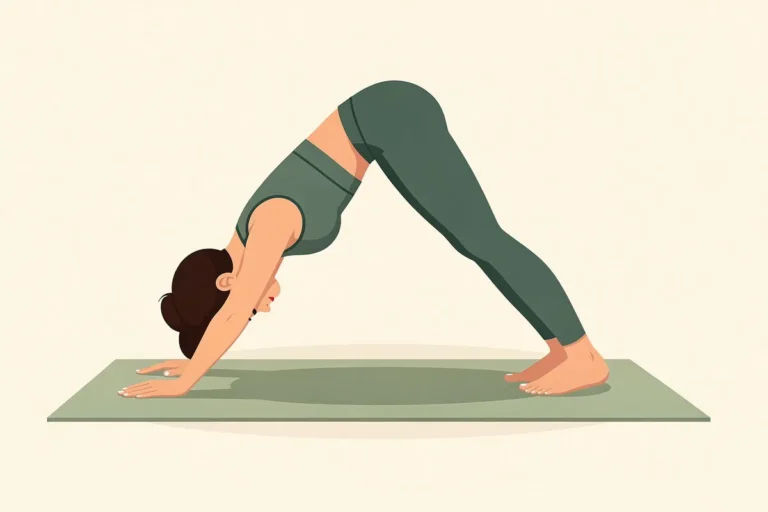
- Step in from: Downward-Facing Dog. Step one foot forward between your hands, then lower the back knee onto your padding.
- Balance the stretch: Half Splits stretches the back of the front leg after Low Lunge has stretched the front of the back leg.
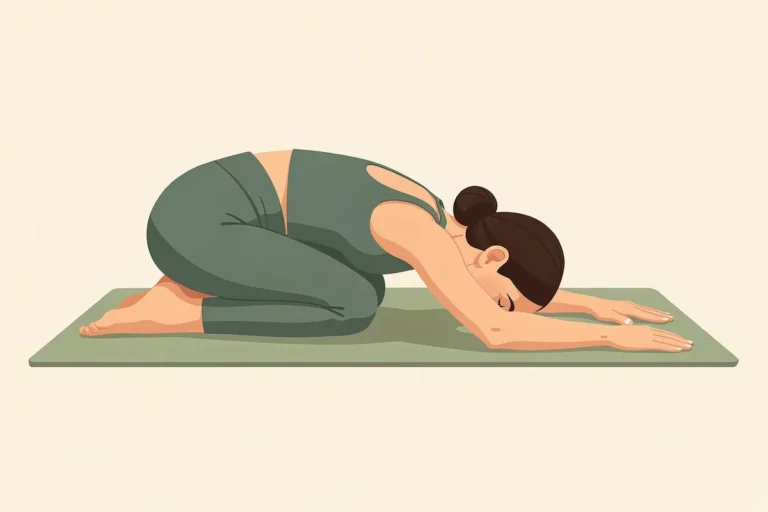
- Rest: sit back into Child’s Pose.
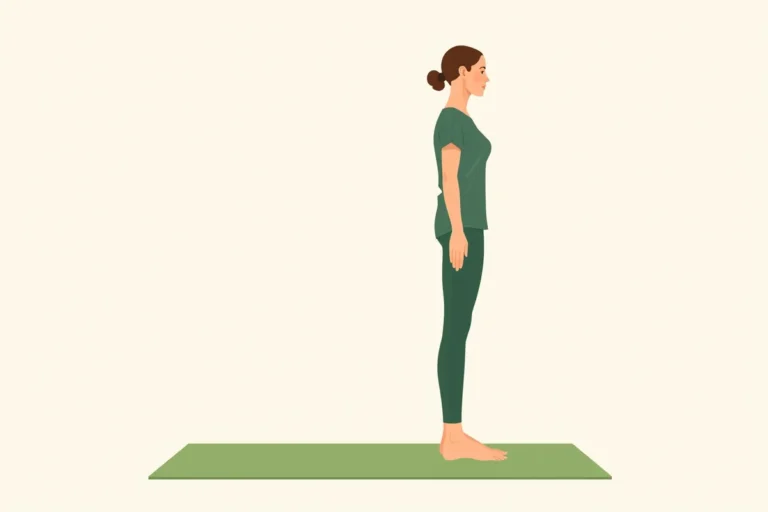
- Come up to standing: step the back foot forward to meet the front one, bend your knees and roll up slowly into Mountain Pose.
- Read next: yoga for tight hips, where Low Lunge is part of a 15-minute routine, and how long to hold a yoga pose.
Who should skip it or ask a doctor first
- Knee pain or a knee injury. The NCCIH names knee injuries among the health problems that may mean adapting your yoga. Pad the back knee, keep the front knee over the ankle, or use the chair lunge. If a knee is warm, red or swollen, or kneeling makes the pain worse, stop kneeling and see a doctor rather than working through it. Get help the same day if the knee is badly swollen or you also have a fever (NHS).
- Knee replacement. The recovery instructions from MedlinePlus tell people not to kneel down to pick things up. Ask your surgeon or physical therapist when kneeling and lunging are OK for you. Until then, skip this pose, including the chair lunge, unless your physical therapist has shown you a version that suits your new knee.
- Hip replacement or a hip injury. Low Lunge moves the back hip behind your body (hip extension). Stepping the front foot up between your hands also bends the front hip well past a right angle, the kind of bending MedlinePlus tells people to avoid after a hip replacement, especially in the first few months. In a motion-capture study of 20 regular practitioners, a related pose, Crescent Lunge, was one of the poses that took the hip into extension (Mears et al., 2018). Ask your surgeon or physical therapist whether and when this pose is safe for you.
- Lower-back problems. Lower (lumbar) spine disease is another condition the NCCIH names. Keep your torso upright, keep the lunge shallow and skip the arms-overhead version. Sciatica pain may get worse when you bend backward, especially when spinal stenosis is the cause, notes MedlinePlus.
- Balance problems. The NCCIH names balance issues too. Use blocks under your hands and kneel next to a wall or a sturdy chair you can hold. The chair lunge has you stand on one leg, so try it only with both hands on the backrest.
- Older adults. Extra caution makes sense from age 65 on: the NCCIH notes that the rate of emergency-room visits for yoga injuries is higher in that age group than in younger adults. Talk with your health care provider about what suits you, as the NCCIH advises, and keep a wall or sturdy chair within reach.
- Pregnancy. The NCCIH says a health care provider should check that exercise is safe for you first. The NHS advises avoiding activities with a risk of falling, so use a shorter lunge with blocks or a chair within reach, and stop if you feel unwell, overheated or uncomfortable. If you have pelvic girdle pain, the NHS advises staying active while avoiding anything that makes the pain worse. It notes that standing on one leg or moving your legs apart can do that, and stepping into a lunge does both. Skip the pose if it hurts your pelvis, and ask your midwife or physical therapist.
- Recent injury or surgery, severe high blood pressure, or another health condition: check with your health care provider first (NCCIH).
What the research says
Evidence: no good evidence
No trial we could find has put Low Lunge itself to the test, which is why this box reads “No good evidence.” A PubMed search for Low Lunge and Anjaneyasana found no papers. Adding the related Crescent Lunge found four, and none of them tested a lunge pose for a health outcome. A few studies of similar lunge stretches are worth knowing about, mainly for technique and safety:
- A daily lunge stretch for six weeks. In 23 young adults with tight hip flexors, 12 did a lunge stretch with one arm reaching overhead and across, holding it five times for 30 seconds on each leg every day. After six weeks, their score on a hip-flexor length test improved by about 6 degrees on average, compared with about 2.6 degrees in the 11 people who didn’t stretch, a difference of about 3 degrees. The study was small, it compared legs rather than people, and the stretch wasn’t taught as the yoga pose (Ehresman et al., 2025).
- Tucking the pelvis under. In a one-day study of 26 active young adults, a half-kneeling stretch that added an active backward tilt of the pelvis (tucking it under) changed a lab test of hip-flexor tension more than the usual version, in which people pushed the hips forward while keeping the lower back neutral, not arched. Neither version changed a hamstring test. The study measured only right after stretching and didn’t measure how far the hip moved (González-de-la-Flor et al., 2024). It fits the common cue to let your tailbone point down, but it doesn’t show the cue matters over weeks.
- Hip position. The motion-capture study in the caution box measured hip angles in 11 poses. Crescent Lunge was one of the poses that took the hip into extension, a finding meant to help surgeons advise patients after hip surgery (Mears et al., 2018).
None of this shows that Low Lunge improves your health. It earns its place as a simple, adjustable way to stretch the front of the hip.
Frequently asked questions
What does Low Lunge stretch?
Mainly the hip flexors of your back leg, the muscles that lift your thigh toward your body. The two main ones, the psoas and the iliacus, run from your lower back and pelvis to the top of your thigh bone (Harvard Health). Harvard also describes the rectus femoris, which runs down the front of the thigh and helps both bend the hip and straighten the knee. Because it crosses both joints, the front-thigh variation, with the back knee bent more, reaches it further. Harvard notes that long hours of sitting can leave the hip flexors tight and short. For the outer hips and inner thighs, see yoga for tight hips.
What’s the difference between Low Lunge, High Lunge and Crescent Lunge?
In Low Lunge your back knee rests on the floor. In High Lunge, also called Crescent Lunge, you tuck your back toes and lift the back knee, so your legs carry all your weight and your balance works harder. Some teachers also call the arms-up Low Lunge a “low crescent lunge,” so check whether the back knee is up or down.
Should your front knee go past your toes in Low Lunge?
No. Keep it behind your toes, as Cleveland Clinic advises for this stretch. Start with the knee right over your ankle. If it edges forward as you sink deeper, keep it behind your toes and ease off if the knee feels any strain. With sore or injured knees, keep it directly above the ankle.
Why does Low Lunge hurt my knee?
Usually it’s the back knee pressing into the floor. Add padding and slide that knee back so your weight rests above the kneecap. If it’s the front knee, check that it points over your middle toes, then move your front foot forward until the knee is back over your ankle, and don’t sink as deep. Still sore? Use the chair lunge, and see a doctor if the pain lasts or the knee swells.
How long should you hold Low Lunge?
Start with 5 to 8 slow breaths on each side. To reach a full minute, repeat it: Harvard Health suggests repeating its kneeling hip flexor stretch until the holds add up to 60 seconds. That fits the American College of Sports Medicine’s advice of about 60 seconds per flexibility exercise, on at least two days a week (Garber et al., 2011). For timing in other poses, see how long to hold a yoga pose.
What does Anjaneyasana mean?
The pose is named for Anjana, the mother of Hanuman, a hero of the Indian epic the Ramayana. Hanuman has his own pose, Hanumanasana, the full front splits, and Low Lunge is a common first step toward it.
Sources
- National Center for Complementary and Integrative Health (NCCIH). Yoga: Effectiveness and Safety. Last updated August 2023., checked Nov 8, 2026
- NHS. Bursitis. Page last reviewed October 30, 2023., checked Nov 8, 2026
- Harvard Health Publishing. Do you spend most of your day sitting? These hip flexor stretches are for you. December 18, 2024., checked Nov 8, 2026
- Cleveland Clinic. Tight Hips? Try These 11 Hip-Opening Stretches. Health Essentials. December 4, 2025., checked Nov 8, 2026
- Garber CE, Blissmer B, Deschenes MR, et al. American College of Sports Medicine position stand. Quantity and quality of exercise for developing and maintaining cardiorespiratory, musculoskeletal, and neuromotor fitness in apparently healthy adults: guidance for prescribing exercise. Med Sci Sports Exerc. 2011;43(7):1334-1359., checked Nov 8, 2026
- NHS. Knee pain. Page last reviewed December 21, 2023., checked Nov 8, 2026
- MedlinePlus (U.S. National Library of Medicine). Knee joint replacement – discharge. Reviewed November 7, 2024., checked Nov 8, 2026
- Mears SC, Wilson MR, Mannen EM, Tackett SA, Barnes CL. Position of the Hip in Yoga. J Arthroplasty. 2018;33(7):2306-2311., checked Nov 8, 2026
- MedlinePlus (U.S. National Library of Medicine). Taking care of your new hip joint. Reviewed November 7, 2024., checked Nov 8, 2026
- MedlinePlus (U.S. National Library of Medicine). Sciatica. Reviewed August 27, 2024., checked Nov 8, 2026
- NHS. Exercise in pregnancy. Page last reviewed September 24, 2026., checked Nov 8, 2026
- NHS. Pelvic pain in pregnancy. Page last reviewed December 12, 2022., checked Nov 8, 2026
- Ehresman BA, Lehecka BJ, Hiser D, Koster L, Wietharn J. Improved Hip Flexibility and Gluteal Function Following a Daily Lunge-and-Reach Stretching Intervention. Int J Sports Phys Ther. 2025;20(6):814-823., checked Nov 8, 2026
- González-de-la-Flor Á, Cotteret C, García-Pérez-de-Sevilla G, Domínguez-Balmaseda D, Del-Blanco-Muñiz JÁ. Comparison of two different stretching strategies to improve hip extension mobility in healthy and active adults: a crossover clinical trial. BMC Musculoskelet Disord. 2024;25(1):853., checked Nov 8, 2026
- Newell Z. The Mythology Behind Anjaneyasana (Low Lunge). Yoga International., checked Nov 8, 2026
Image credits: Illustration: AI-generated for YogaForFitness (FLUX.2 [pro]), checked for pose accuracy