- Level: Beginner
- Pose type: Supine · Backbend
- Body area: Glutes · Hamstrings · Hips · Spine
- Props: block, blanket
Bridge Pose (Setu Bandha Sarvangasana)
Pronounced SAY-too BAHN-dah sar-vahn-GAHS-ah-nah
Quick answer
Lie on your back with your knees bent and your feet flat, hip-width apart and a few inches from your hips. Press down through your feet and lift your hips, keeping your knees pointing forward and your weight on your shoulders, not your neck. Keep your head still while you're up, and lift only as high as you can without arching your lower back.
We may earn a commission when you buy through links on this page. It never changes what we recommend. As an Amazon Associate we earn from qualifying purchases.
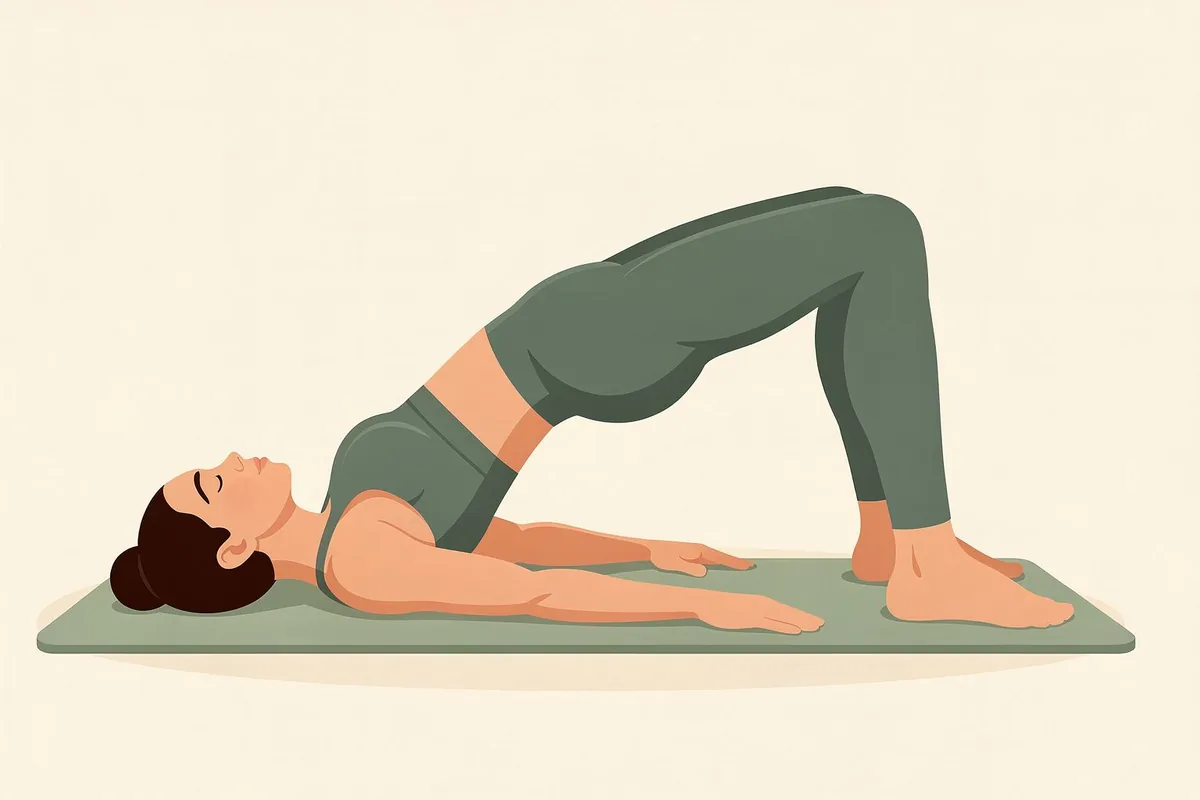
Bridge Pose is a gentle backbend you do lying on your back. Your feet, arms, shoulders and the back of your head stay on the floor while your hips rise, so your body forms a slope, highest at your knees and lowest at your shoulders. The work comes mostly from the backs of your legs and your buttocks, and the fronts of your hips open as they lift.
It is one of the first backbends most beginners learn, because you can make it as small as you like and it never asks you to hold your body weight on your hands. This guide covers the setup, where to put your feet, how to keep your knees and neck safe, the block-supported version and when to talk to a clinician before you try it. It is part of our pose library. New to yoga? Begin with yoga for beginners.
In this guide
How to do Bridge Pose
- Lie on your back on a mat. Bend your knees and set both feet flat on the floor.
- Place your feet about as wide as your hips, parallel, toes pointing forward. Slide your heels in until they sit a few inches in front of your buttocks; as a rough check, with your arms by your sides your fingertips should just about reach your heels (longer or shorter arms change this).
- Rest your arms along your sides with your palms facing down. Check that your head is centered and your chin is level, neither tucked hard nor tipped back.
- Breathe out and press evenly through both feet, especially the heels and the inner edges. Feel your buttocks and the backs of your thighs switch on.
- Keep pressing and lift your hips off the floor. Go only as high as you can while your lower back stays long rather than sharply arched.
- Once you are up, the weight rests on your feet, your upper arms and the backs of your shoulders. Your neck should feel free, with a small space between the back of your neck and the floor.
- Keep your knees in line with your feet, pointing toward the front of the room. Look straight up and don’t turn your head to either side.
- Breathe slowly for 3 to 8 breaths.
- To come down, breathe out and lower your hips slowly to the floor. Rest for a breath or two, then repeat if you like. Two or three lifts is plenty to start.
Alignment cues
- Feet: hip-width and parallel, so the outer edges point straight ahead. If your feet turn out, your knees tend to follow.
- Distance from your hips: roughly below your knees once you are lifted. Too far away and the backs of your thighs do most of the work; too close and your heels may lift.
- Knees: over your ankles and in line with your second toes. Think of your knees reaching gently forward, past your toes, rather than out to the sides.
- Hips: lift them level. If one side drops, lower down a little and try again with even pressure in both feet.
- Buttocks: working, but not clenched so hard that your knees swing apart.
- Lower back: let your hips do the lifting and keep your lower back long. ACE suggests drawing your belly in gently before you lift and keeping it there, which helps keep the arch in check.
- Shoulders: roll them a little under you so you rest on the backs of the shoulders and upper arms. They are the base of the pose, not your neck.
- Neck and head: still and centered, eyes looking at the ceiling. Your chest moves toward your chin; your chin doesn’t jam into your chest.
- Breath: lift as you breathe out and keep breathing smoothly while you hold.
Common mistakes
- Knees splaying out. Knees that drift wider than your feet pull your legs out of line, and the backs of your legs do less of the work. Bring your feet back under your knees and press through your inner feet. A block between your thighs helps (see props).
- Pushing up from your lower back. Driving your hips as high as possible usually just deepens the arch in your lower back. ACE warns against pushing the hips too high for this reason, and Cleveland Clinic says the move should come from the hips, not the lower back. Lower down until your back feels long.
- Feet too far away. With your heels far from your hips, the backs of your thighs end up doing most of the lifting and can cramp. Cleveland Clinic’s tip for cramping is to bring your heels closer to your buttocks.
- Turning your head. Looking around to check your knees or a screen while your hips are up twists your neck while it carries load. Keep your head still; come down first if you need to look.
- Weight in the neck. If you feel pressure in your neck, you have lifted too high or your shoulders are not under you. Lower your hips and shuffle your shoulders in a little.
- Holding your breath. If you can’t breathe easily, make the lift smaller.
Watch out for: pain in your neck, sharp or pinching pain in your lower back, knee pain or tingling down a leg. Come down, rest and try the supported version. Cleveland Clinic advises lowering your hips and tightening your core if your back hurts; if pain keeps coming back, see a doctor or physical therapist.
Make it easier (props)
- A block under your sacrum (Supported Bridge). Lift your hips, slide a yoga block under the flat bony area at the back of your pelvis (the sacrum, above the tailbone) and rest your weight on it. Start with the block on its lowest, flattest side. Your legs and buttocks can relax, and the pose becomes a resting position. To come out, lift your hips, slide the block away and lower down.
- A block between your thighs. Hold a block between your inner thighs, just above your knees, turned so it’s at its narrowest width, and squeeze it lightly as you lift. It keeps your knees from splaying and gives your inner thighs a job.
- A folded blanket under your shoulders. If the floor feels hard under your shoulders, a thin, firm folded blanket under your shoulders, with its folded edge at the tops of your shoulders, can make the base more comfortable. Your neck and head stay off the blanket, on the floor. Skip it if it makes your neck feel more bent.
- A smaller lift. Lift your hips only an inch or two and lower again, a few times with your breath. It is still Bridge.
- Hands under your back. For a little extra support once you are up, bend your elbows, keep them on the floor and rest your hands under your lower back or buttocks, as Cleveland Clinic suggests.
Helpful gear for this pose
 Manduka begin yoga mat, 5 mm
5 mm TPE mat, 68 x 24 in, light to carry, with a center alignment stripe (maker's spec).
See it on Amazon Gaiam foam yoga blocks, pair
Two light foam blocks, 9 x 6 x 4 in each, to raise the floor under your hands (maker's spec).
See it on Amazon Hugger Mugger cotton D-ring yoga strap, 10 ft
Cotton webbing 1.5 in wide with a metal D-ring buckle, 10 ft long (maker's spec).
See it on Amazon
As an Amazon Associate we earn from qualifying purchases. How we choose gear
Variations
- Supported Bridge. The block version above. It is a calm way to finish a session, and a good choice when the active pose is too much.
- Bridge lifts. Instead of holding, lift as you breathe out and lower as you breathe in, 5 to 8 times. Moving with your breath is a gentle warm-up for the hold.
- Rolling Bridge. Lift and lower one part of your back at a time, starting with your tailbone on the way up and your upper back on the way down. It rounds your spine a little as you roll, so ask first if you have low bone density (see the caution box).
- One-leg lift (single-leg Bridge). From Bridge, keep your hips level and lift one foot an inch off the floor, or straighten that leg toward the ceiling if you can keep your hips from dropping. Hold for a breath or two, put the foot down and switch sides. It is a much harder version, so build up to it.
- Arms clasped under your back. Once your hips are up, draw your shoulder blades a little closer together underneath you, then reach your hands toward your feet and interlace your fingers on the floor beneath you. This opens the chest more and puts more weight on your shoulders. Release your hands before you come down. Skip it with a shoulder problem.
- Hands holding the mat. If clasping is uncomfortable, grip the edges of your mat beside your hips instead.
Is Bridge Pose the same as a glute bridge?
They are close relatives. Both start on your back with your knees bent, and both lift the hips by working the buttocks and the backs of the thighs. The difference is mostly in how you use them.
| Yoga Bridge Pose | Gym glute bridge | |
|---|---|---|
| Goal | a held pose; strength plus a gentle opening of the hips and chest | a strength exercise for the buttocks |
| How it’s done | held for several breaths | repetitions with short holds (Cleveland Clinic suggests 3 to 5 seconds each) |
| Upper body | shoulders roll under, chest lifts toward the chin, arms may clasp | shoulders flat, arms by the sides |
| Harder versions | one leg lifted, arms clasped, later Wheel Pose | one leg, a band above the knees, weights across the hips |
A hip thrust is another close relative: your upper back rests on a bench, so your hips travel through a bigger range, often with added weight. If you want more on why poses you hold with muscle effort differ from relaxed stretches, see mobility vs flexibility.
Poses to do before and after
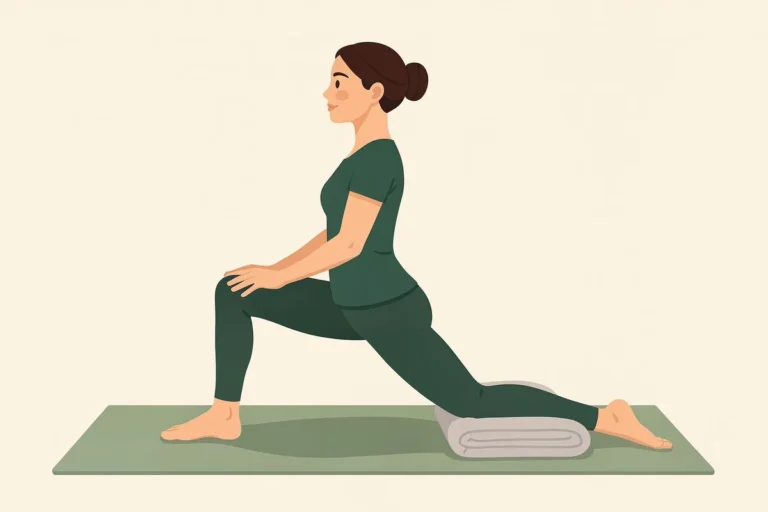
- Before: Cat-Cow warms up your spine. A Low Lunge stretches the fronts of your hips, which open in Bridge. A few small bridge lifts make a good warm-up for a longer hold.
- After: hug your knees to your chest for a few breaths, or rest with your feet wide and your knees falling together. A reclined twist or Child’s Pose also works.
- Related: Cobra Pose is the other beginner backbend, done face down. Bridge appears in our yoga for tight hips routine and in the four-week plan in yoga for beginners.
Who should skip it or ask a doctor first
- Neck problems or a past neck injury. In Bridge, your neck is bent forward while your shoulders take your weight, so a neck problem is a reason to ask your doctor or physical therapist first. If you do practice it, keep your hips low or use the block, never turn your head while you are up, and come down at once if your neck hurts.
- Shoulder problems. Skip the clasped-arms version and keep your arms by your sides. The NCCIH lists preexisting injuries among the conditions that may call for changes to your yoga practice.
- Knee problems. The NCCIH names knee and hip injuries in the same list. Bridge holds your knees bent at about a right angle with some load on them. Move your feet a little farther away if bent knees ache, keep your knees in line with your feet, and stop if a knee hurts.
- Lower-back conditions. The NCCIH also lists lumbar spine disease. Keep the lift small, so your lower back stays long, or use Supported Bridge. With spinal stenosis, extending (arching) the lower back can make symptoms worse (NIAMS), and bending backward is among the things that can worsen sciatica pain, especially when stenosis is the cause (MedlinePlus). Ask your doctor or physical therapist before you try it.
- Pregnancy. Get checked by your health care provider before you exercise, as the NCCIH advises. Bridge starts and ends lying on your back. The NCCIH advises avoiding yoga poses with long periods of lying on your back, and the NHS says that later in pregnancy, any time spent lying flat should be kept to a few minutes at most. Skip Bridge while you’re pregnant, and ask your doctor or midwife which movements suit you. Cat-Cow on your hands and knees is a gentle spine movement to do instead. If you need a rest, lie on your side, propped with pillows.
- Glaucoma. Your hips are above your head in Bridge. We found no study of eye pressure in Bridge itself, but in a small study, eye pressure rose within a minute in four other poses with the head down, including legs raised up a wall (Jasien et al., 2015). The NCCIH lists glaucoma among the conditions that may call for changes. Ask your eye doctor, and keep the lift low and short.
- Osteoporosis or low bone density. Doctors at Mayo Clinic who reviewed the records of 89 patients injured by yoga advise people with low bone density to avoid extreme forward rounding of the spine, and they urge everyone to take care with extreme backbends (Lee et al., 2019). Plain Bridge is neither, but the Rolling Bridge rounds your spine a little as you roll down, so check with your doctor before using it, and don’t lift so high that your weight shifts toward your neck. Ask your doctor or physical therapist which positions suit you.
- Severe high blood pressure, balance problems or age 65 and older. The NCCIH lists these too, and notes that the rate of yoga injuries treated in emergency departments is higher in people 65 and older than in younger adults. Talk with your health care provider, and take your time getting down to and up from the floor.
What the research says
Evidence: no good evidence
We found no trial that tested Bridge Pose by itself for a health benefit, so the chip above reads “No good evidence.” PubMed searches for “bridge pose”, “setu bandha” and “setu bandhasana” turned up no study of the pose, and “setubandhasana” found one small study that paired it with another pose, with no Bridge-only result. The gym version, the bridge exercise, has been studied more, but mostly for which muscles it works:
- Which muscles work. In a lab study of 30 healthy adults doing 9 rehabilitation exercises, the authors did not list the two-leg or single-leg bridge among the exercises whose muscle activity suggested a strength effect; they suggest that exercises below about 45% of maximum effort may suit endurance or stabilization training more than strength building (Ekstrom et al., 2007).
- Where to put your foot. In 28 healthy adults aged 18 to 30, a single-leg bridge with the working knee bent more sharply (heel closer to the hips) cut hamstring activity from about 75% to 23% of maximum, while the buttock muscles stayed about as active (Lehecka et al., 2017). That fits the common cue to bring your heels in if the backs of your thighs cramp.
- Eight weeks of bridges. In a trial that randomized 32 healthy university students (30 finished), one group did two-leg bridges for 15 minutes a day for 8 weeks and the other did seated buttock squeezes. Hip extension strength improved within each group, and there was no significant difference between the two. There was no group that did neither exercise (Lehecka et al., 2019).
These studies describe a fitness exercise in young, healthy people, not the held yoga pose, and none measured pain or a health outcome. Bridge’s value is practical: a backbend you can scale from a tiny lift to a supported rest.
Frequently asked questions
How long should you hold Bridge Pose?
Start with 3 to 5 slow breaths and repeat two or three times. As it gets easier, work up to about 8 breaths per lift. Cleveland Clinic suggests holding for five to eight breaths and repeating three to five times. Supported Bridge on a block can be held longer, for a minute or more, if it feels comfortable. See also how long to hold a yoga pose.
Is Bridge Pose a backbend or an inversion?
It is usually taught as a gentle backbend: the fronts of your hips and chest open while the back of your body works. Because your hips end up higher than your head, some teachers also call it a mild inversion. Either way, your head stays on the floor and you don’t balance on it.
Is Bridge Pose good for lower back pain or sciatica?
No study we found tested Bridge Pose for back pain or sciatica. Done with a small lift, it mainly works the buttocks and the backs of the thighs, but extending (arching) the lower back can worsen some back conditions, such as spinal stenosis (NIAMS). If your back hurts, ask a doctor or physical therapist whether Bridge suits you. The NCCIH says yoga shouldn’t be a reason to delay getting a medical problem checked. Our guide to yoga for lower back pain goes deeper.
Why does Bridge Pose hurt my lower back?
Usually because you have lifted too high and the bend has moved into your lower back. Lower your hips until your back feels long, draw your belly in gently and press through your heels, or switch to Supported Bridge. If it still hurts, stop and get it checked.
Why does Bridge Pose hurt my knees?
Check where your knees point: if they fall in or splay out, line them up over your feet, or use a block between your thighs. If your feet are very close to your hips, move them a little farther away. Stop if the pain continues, and ask a doctor or physical therapist, especially after a knee injury.
Is Bridge Pose good for the pelvic floor?
We found one small study. In 15 healthy women who had given birth (postpartum), ultrasound and pressure readings showed that a bridge exercise acted on the pelvic floor muscles differently from a pelvic floor squeeze (a Kegel) on every measure (Siff et al., 2020). It doesn’t show that Bridge strengthens the pelvic floor. If pelvic floor health is your concern, a doctor or pelvic floor physical therapist can advise you.
Is Bridge Pose safe during pregnancy?
No, we suggest skipping it. Bridge begins and ends lying on your back, which the NCCIH advises avoiding for long periods during pregnancy, and the NHS suggests keeping time spent flat on your back to a few minutes at most later in pregnancy. Ask your doctor or midwife which movements suit you; Cat-Cow on your hands and knees is one that keeps you off your back.
Does Bridge Pose reduce belly fat or hip fat?
We found no study showing that Bridge reduces fat in any one area. It is a strengthening pose, not a weight-loss method.
Sources
- National Center for Complementary and Integrative Health (NCCIH). Yoga: Effectiveness and Safety. Last updated August 2023., checked Nov 10, 2026
- American Council on Exercise (ACE). Exercise Library: Glute Bridge., checked Nov 10, 2026
- Cleveland Clinic. Glute Bridges: How To Do Them and Form Tips. Health Essentials. August 25, 2026., checked Nov 10, 2026
- Cleveland Clinic. Tight hips? Try these 11 hip-opening stretches. Health Essentials. December 4, 2025., checked Nov 10, 2026
- National Institute of Arthritis and Musculoskeletal and Skin Diseases (NIAMS). Spinal Stenosis. Last reviewed November 2023., checked Nov 10, 2026
- MedlinePlus (U.S. National Library of Medicine). Sciatica. Reviewed August 27, 2024., checked Nov 10, 2026
- Lee M, Huntoon EA, Sinaki M. Soft tissue and bony injuries attributed to the practice of yoga: a biomechanical analysis and implications for management. Mayo Clin Proc. 2019;94(3):424-431., checked Nov 10, 2026
- Jasien JV, Jonas JB, de Moraes CG, Ritch R. Intraocular pressure rise in subjects with and without glaucoma during four common yoga positions. PLoS One. 2015;10(12):e0144505., checked Nov 10, 2026
- NHS. Exercise in pregnancy. Page last reviewed September 24, 2026., checked Nov 10, 2026
- Ekstrom RA, Donatelli RA, Carp KC. Electromyographic analysis of core trunk, hip, and thigh muscles during 9 rehabilitation exercises. J Orthop Sports Phys Ther. 2007;37(12):754-762., checked Nov 10, 2026
- Lehecka BJ, Edwards M, Haverkamp R, et al. Building a better gluteal bridge: electromyographic analysis of hip muscle activity during modified single-leg bridges. Int J Sports Phys Ther. 2017;12(4):543-549., checked Nov 10, 2026
- Lehecka BJ, Turley J, Stapleton A, Waits K, Zirkle J. The effects of gluteal squeezes compared to bilateral bridges on gluteal strength, power, endurance, and girth. PeerJ. 2019;7:e7287., checked Nov 10, 2026
- Siff LN, Hill AJ, Walters SJ, Walters G, Walters MD. The effect of commonly performed exercises on the levator hiatus area and the length and strength of pelvic floor muscles in postpartum women. Female Pelvic Med Reconstr Surg. 2020;26(1):61-66., checked Nov 10, 2026
Image credits: Illustration: AI-generated for YogaForFitness (FLUX.2 [pro]), checked for pose accuracy